Barefoot Hallucination
  • Blog
  • About
  • Photography
  • Video
  • Music
  • Contact
  • Links to Cool Stuff
  • Wade
  • Cabs

Oh the shark, babe, has such teeth, dear.....

3/29/2018

0 Comments

 
Still working on Talleg. It is a very looooong work in progress. :/ This is way harder than it looks. Or seems like it should be. Or whatever.

This week I am going to talk about scales. I had decided I was going to put fish scales on her breastplate and upper arms. Fish scales seem so....boring. But they are simple enough.

I was still unsure how I was going to implement that part. Last time I did scales, the leaf scales tore the shit out of the rest of the outfit. I need to fix Aoifa's top before I can ever wear her again.

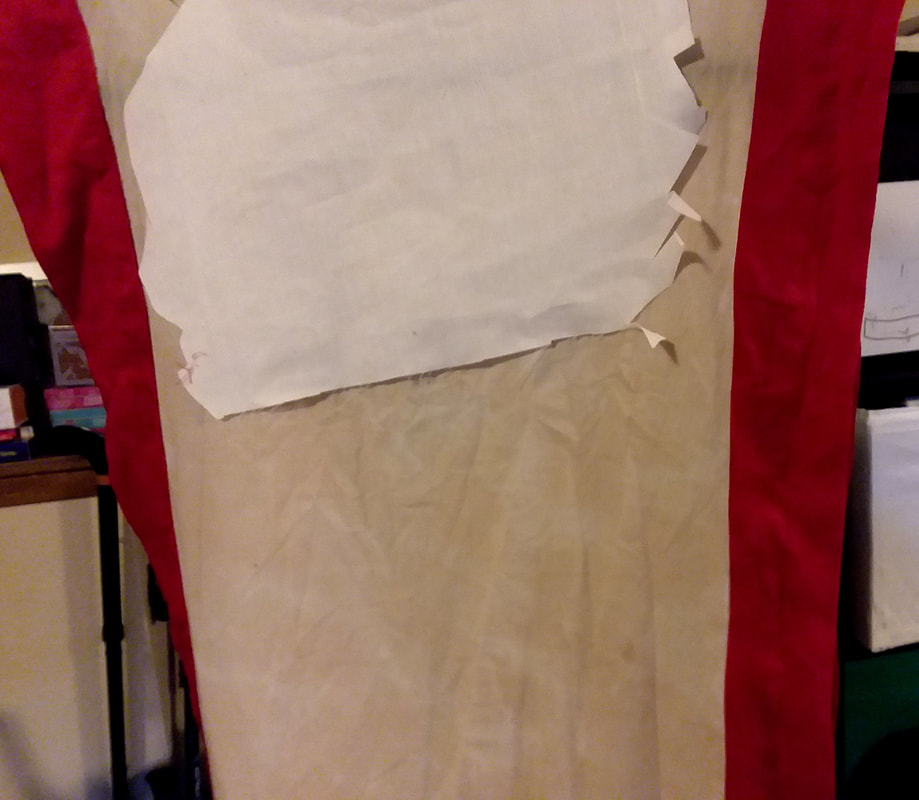
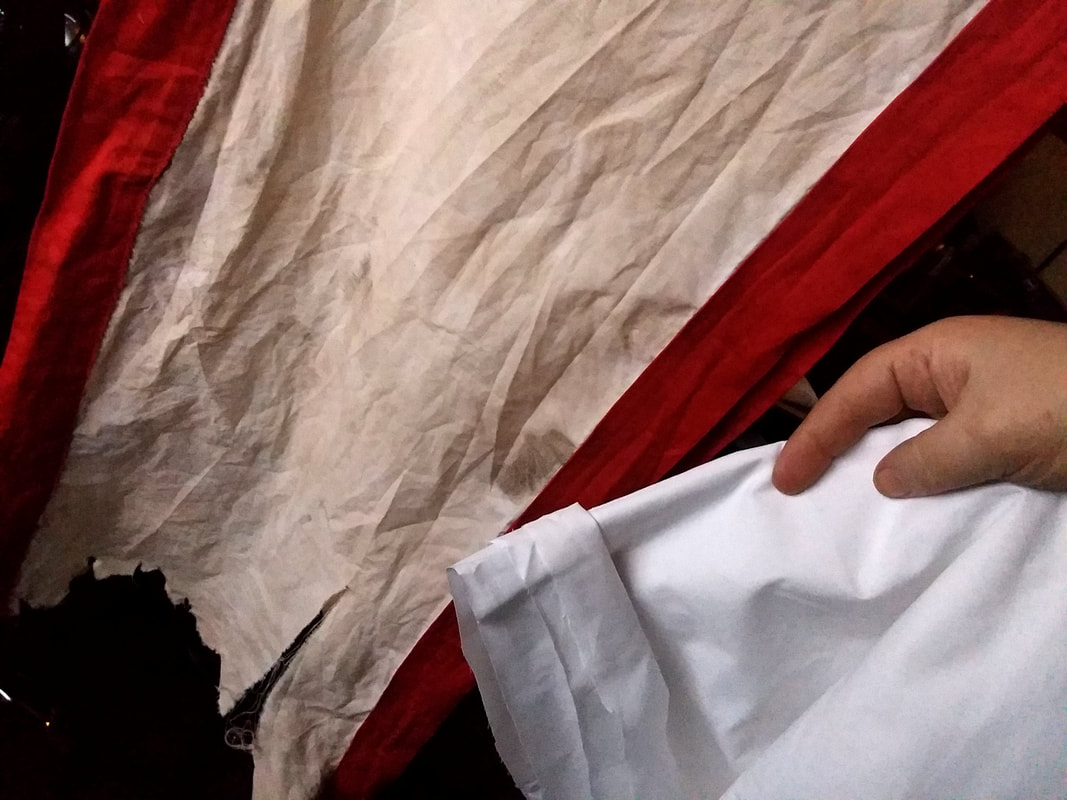
So I thought about other ways to get the scale look. The first thing I tried was cutting scales on the foam and throwing the heat gun on it. It looked....kind of cheesy. Might work for something else, but this? Nah. Besides which, it wouldn't work for the sleeves.
Picture

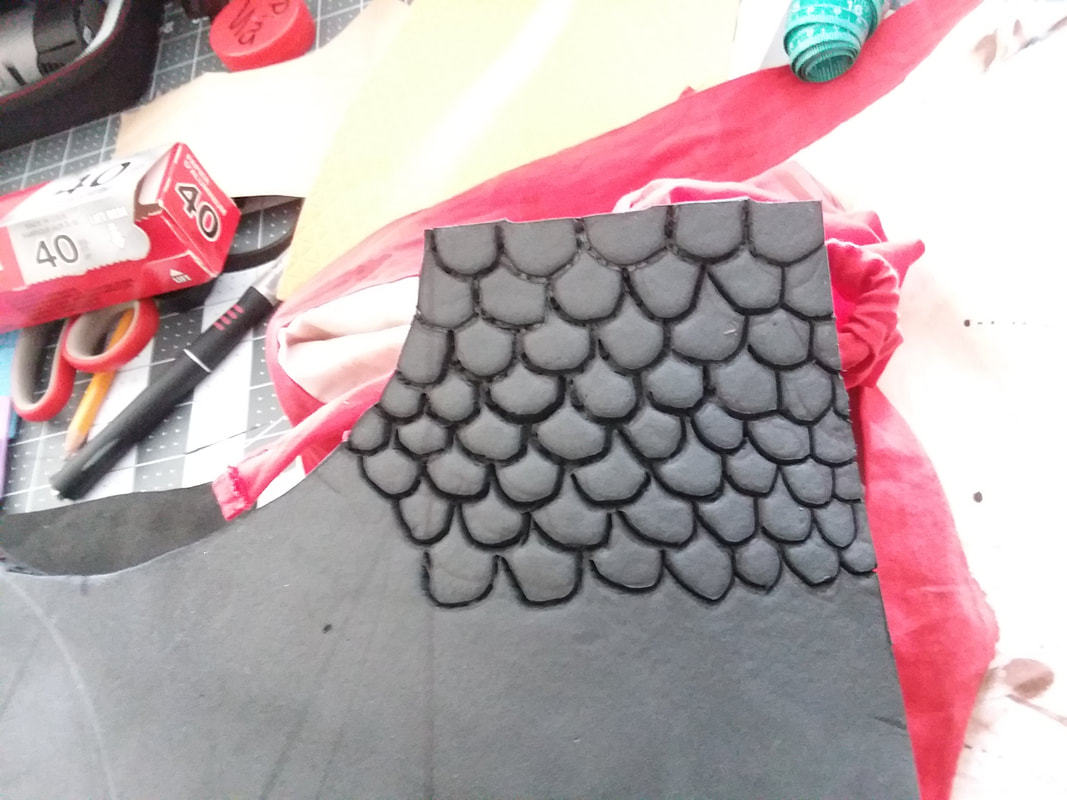
Even if I cleaned that up, it wouldn't look right. It was an idea. I may try to implement it on something else. But it looks cheesy and would be obvious drawn design on the sleeves. So I decided to scrap this idea for now.
A friend of mine was going to 3d print a fish scale cookie cutter so I could use it as a pattern, but his printer stopped working and doesn't seem fixable. For a while there I was in a quandry. I guess I was just going to have to cut out 500 fish scales and go with that.

Then I went to a meeting. Here in Portland there is an active cosplay community. I have struggled to find anyone who wants to help me or work with me. But I found a group on Meetup.com. It is called the Portland Cosplay Crafter's Association. I went to my first meeting, and it was AWESOME! The people were nice. They are maybe more serious about cosplay than I am. I love to do it, and working with others, but I don'tknow that I would ever want to make a business out of it. But they are talking a cosplay co-op kind of situation. Which I think is a WONDERFUL idea! We can buy supplies bulk for cheaper. We can get together a communal space. We can help each other, fill in gaps in our specialities. This is good. I am all in. And one of them said they have a 3d printer, and if I get something scanable they would print out scales for me.

Eureka! That is awesome and totally waht I need. So I decided instead of going plain fish scale, I would go shark scale. Shark scales are different from fish scales. Shark skin itself feels like sandpaper. That is because shark scales are smaller than fish scales, and pointier.
Picture
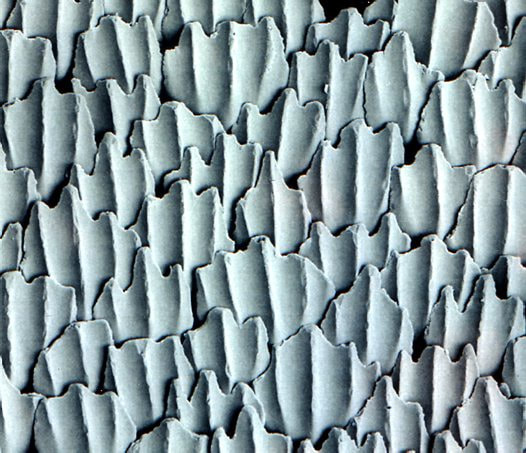
Photo courtesy of the Australian Musem
Picture
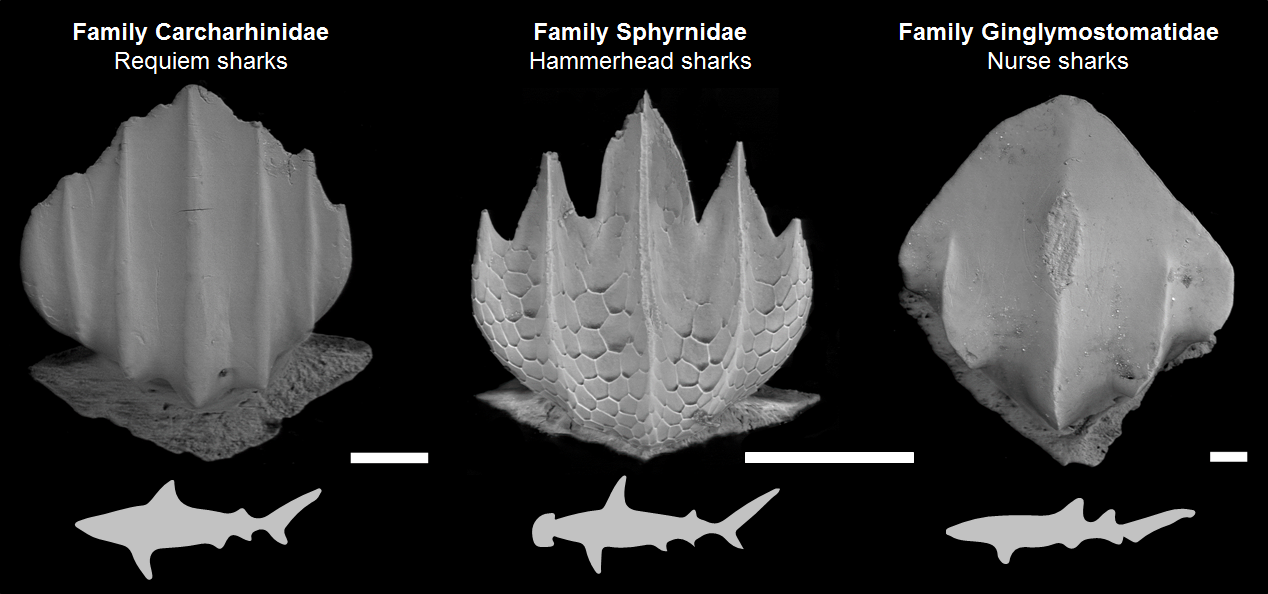
Photo courtesy of the Micronesian Conservation Coalition
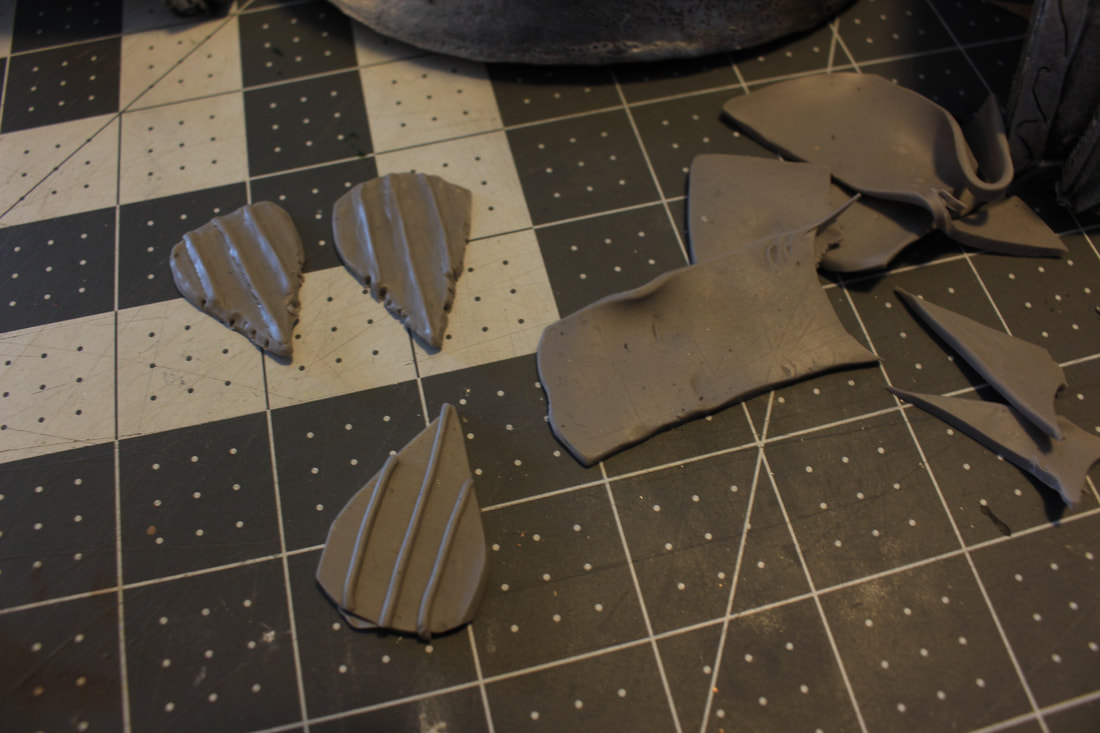
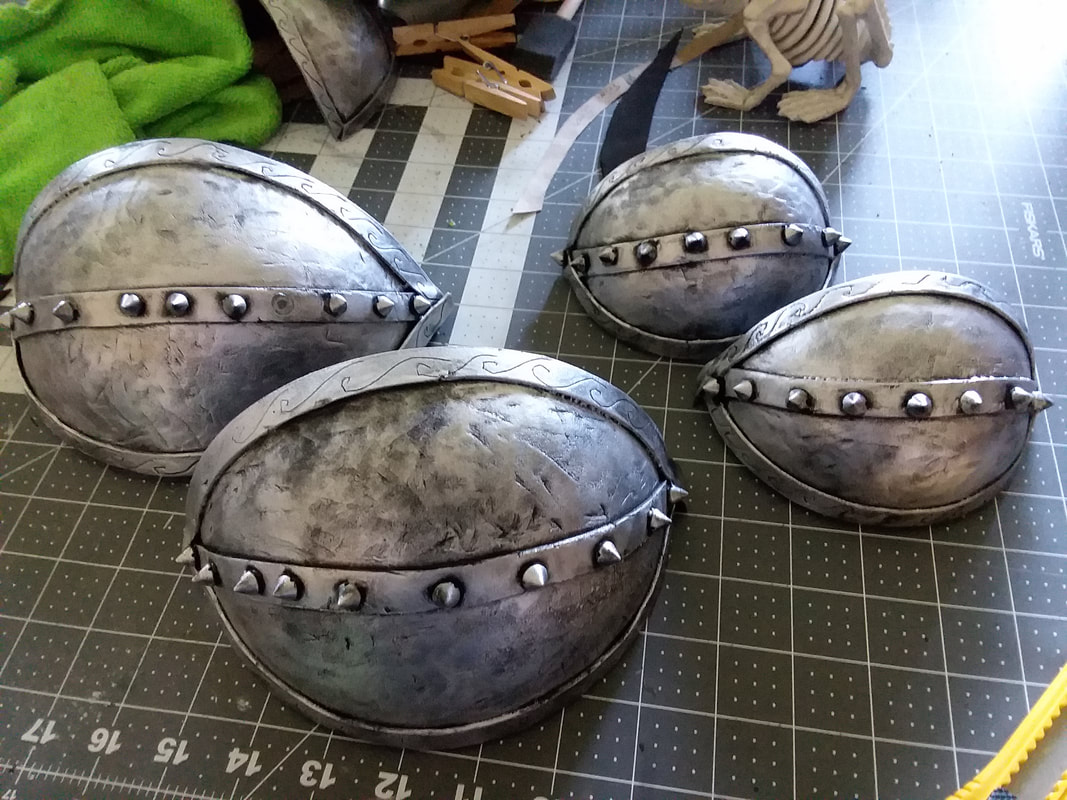
That looks so badass. After looking at tns and tons of pictures on the interwebtubes, I decided to make then kind of like the one on the left in the picture on the right. So I got to sculpting.

I decided not to make them curved. It would be easier to attach them if they are flat. Also less likely to stick out and hurt people and/or costumes. They kind of look like a cross between shark scales and shark teeth.
Picture
Picture

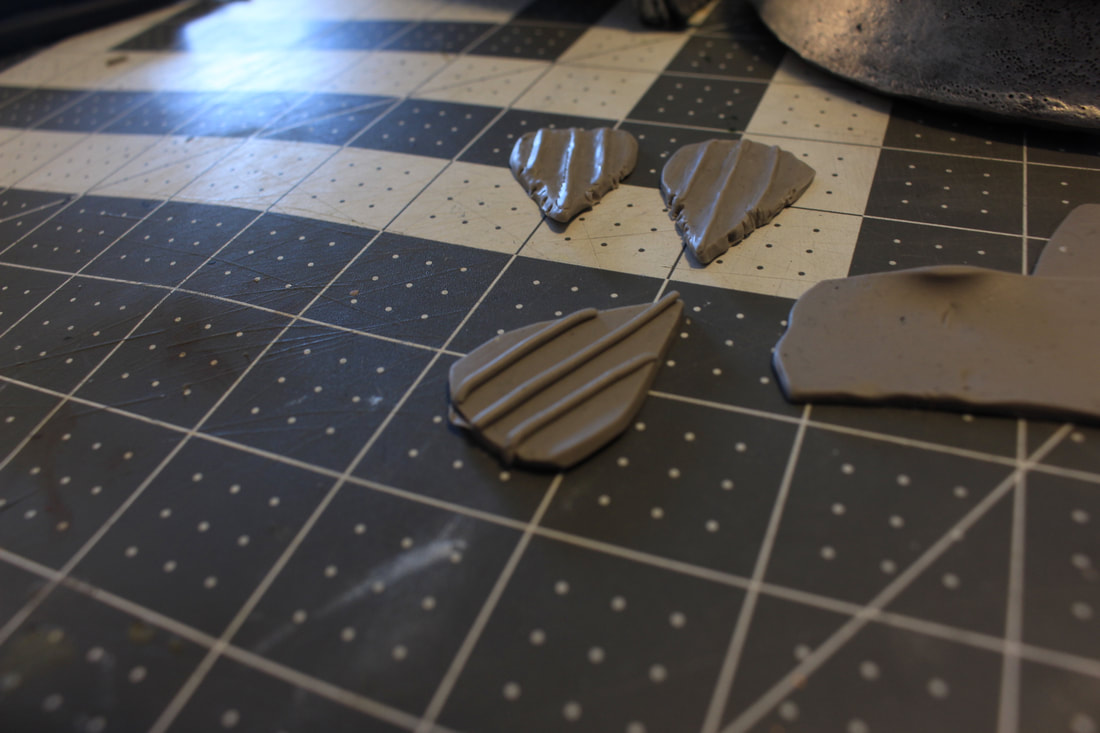
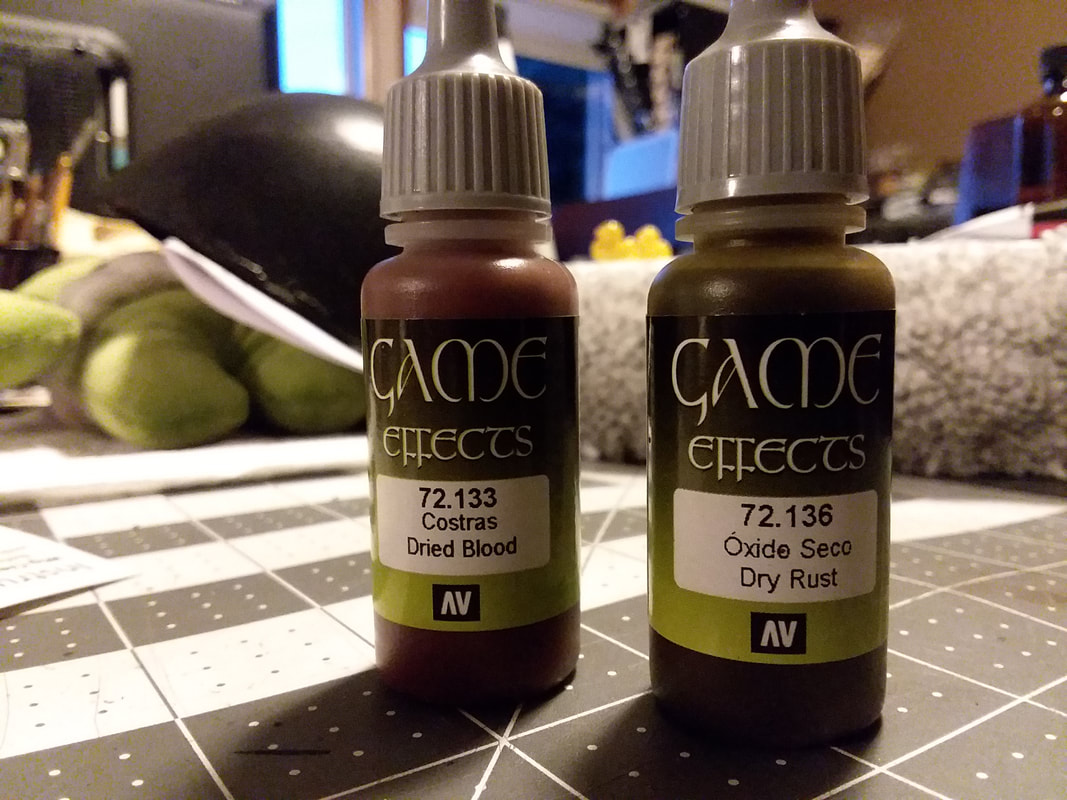
I like the way they turned out though. I could I suppose look around and see if I could find an stl file. I might still do that. But I like the idea of everything being my design. I made them out of SuperSculpey, and baked them.

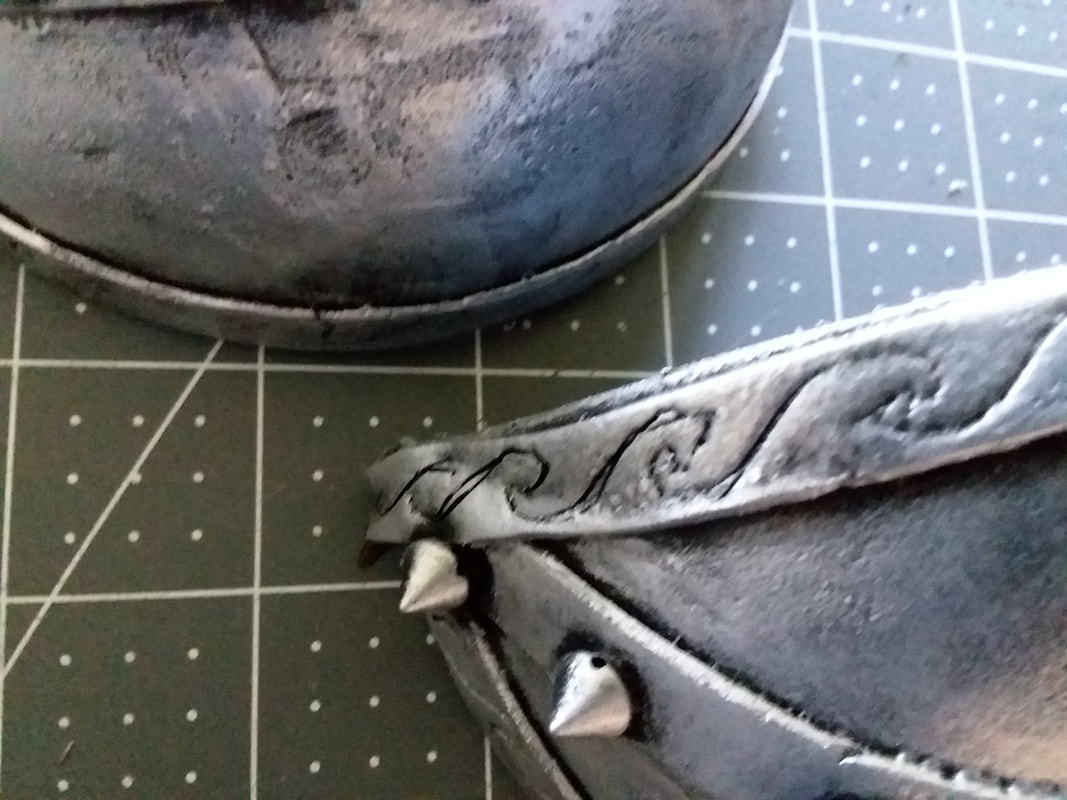
I poked 3 holes in the top. I decided to lace them together kind of like lamellar, though not really lamellar. I will use the side holes to lace them into rows, and the middle hole to lace the rows together. the middle one in this pic was rubed with gilder's wax to see how the design would look finished. I like it.
Picture
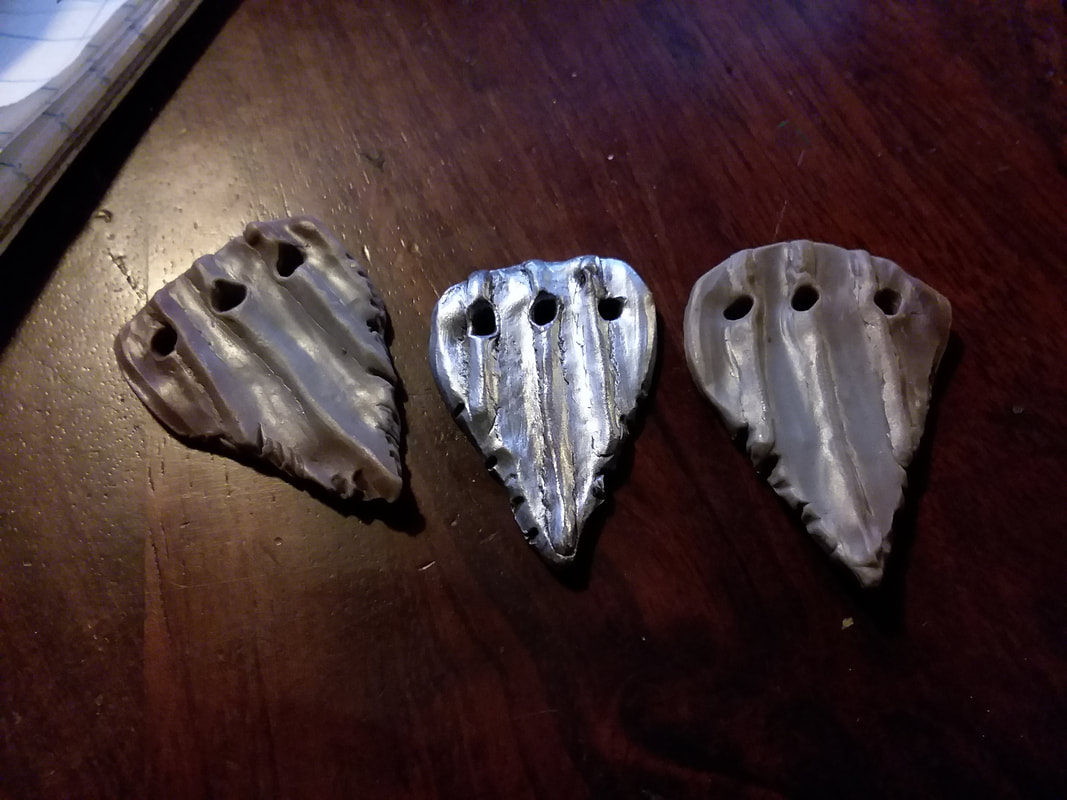
So now I just gotta get them printed. It is going to take a lot of work, but I think it will be worth it in the end.
0 Comments

The knee armor's connected to the...um...other armor...

3/19/2018

0 Comments

 
So this week I worked on elbow and knee armor. I am still having issues getting rid of the fricken seem. One day I will be triumphant. Today is not that day. Sigh.

I started by making a mock up of what I wanted to see how it would turn out. It doesn't look bad, but the stupid obvious seem is still there.
Picture
Picture
I need to get on with the other parts of the armor, so I decided to try one more time. If the seem was still obvious I would just put a strip and spikes on it. I had black plastic spikes I got at target around Halloween that I haven't used, so I thought those would be a good idea. Um, nope. They refuse to stay put. I tried to glue them twice. Argh sigh. So now I am going to go get googly eyes and try to glue those on. I don't know if the glue will stick now that I have the gilder wax down. But as I said, I need to get moving on the other parts of this outfit.
Picture
Picture
Picture
Picture
After I finish the googly eyes, or whatever I finally decide to do with them, I will glue velcro dots inside the corners, so I can attach them to my leggings. Before I work on the leg armor I need to figure out where to place the velcro so I leave that patch open.
0 Comments

Getting wiggy with it.....

3/13/2018

0 Comments

 
So this is the part I have been really excited about. I decided to get my first cosplay wig!

As Talleg is a water genasi, I decided to make her hair blue. As much as I would LOVE to dye my hair blue again permanently, I am still looking for a job. I probably should wait on that. So the next alternative was to get myself a wig. I looked at a bunch of different wig sites. I looked on Amazon. Most were either waaaaaay too expensive or not what I was looking for. The 2 most common places to get cosplay wigs are Arda and Epic Cosplay.
Picture
Picture
Arda did not have a long haired wig in the shade of blue I wanted. Epic, however, had a wide array of styles in the blue-black color I wanted. And they are mid ranged as well. You can expect a wig from there to run you between $30 and $60. Not cheap, but not top of the line either. Still affordable.

This one is the Hera in blue-black. I found this one on sale, so I grabbed it. It was way longer than I wanted it, but I figured if I don't like it I can cut it down. Was still cheaper than a shorter wig that was no on sale.

One of the mixed messages I got from reading reviews and watching unboxing videos was regarding the thickness of the wig. Some people complained that you could see through the wig easily because it was so thin. This wig was not thin at all.
Picture
Picture
It has a dark wig cap, and I have a white foam head. I figured it should be easy to see the thin spots. I had to dig pretty deep to get white. I am pretty happy with that.
Picture
Picture
It was darn hard to catch a picture that really looked like the real color of the wig, though. It came with really long bangs, as they all do. They expect you to cut the bang to fit your face and the style you want. That is fine, except cutting bangs is not my strong suit. I made an attempt. I will probably try to find someone to fix it for me before I actually wear it.
Picture
Picture
 As you can see, it goes all the way past my butt. My opinion is Talleg would cut it off with a dagger before she let it get in her way. Still deciding if I want to cut it or leave it. But overall, I am happy with the wig. I still need to make minor adjustments to make it fit right, but overall it is comfy and not heavy.

The next thing I needed to worry about was wig caps. I wanted the netted wig cap and the overcap. I ended up getting 2 different brands from 2 different sellers on Amazon. Both sets cost the same, but they were very different in quality. One set, the net was sewn on one end and the overcap is yellowish and flimsy. The other is the open ended net cap I wanted and the overcap is more flesh color and feels sturdier. I want the kind that is not sewn on the end, at least for the netted one. My hair felts easily. If I have to sit and tuck and tuck and tuck to get the hairs up and in the cap I will experience felting. But if the end is not sewn, I can bring it all the way down under my chin, then pull the end that is not elasticised up and over, trapping all the hair inside with not tucking involved. Then I can pin the unsewn end into my hair with the pins I use to keep it back. It is not a total waste though. I found I can use the sewn end ones over my spoolies to keep them from rolling around and unwinding at night. Works great.
Picture
Picture
Picture
Picture
As Epic Cosplay wigs don't have clips already in them, I also got some of those. I don't know if I like these kind though. I will have to try them and see how they work long term.
Picture
Picture
I did try styling the wig. It has been a long time since I last did a braid, much less not on my own head. I am going to have to redo it. But I like the style. I still may want to cut it down a bit, but it will definitely be a loose french braid. I did have a lot of trouble with the ends, though. No matter how hard I tried they kept tangling. I used to have hair that was really long. I have hair that is really felty. I am used to having to work to detangle hair. This was difficult. I think the synthetic fibers mixed with the length made it difficult. I had to cut a couple of chunks out completely. Even using detangler did not help those parts. But for the most part, it is a good wig. Go me.
Picture
Picture
Picture
Picture
0 Comments

Testing testing 123

3/10/2018

0 Comments

 
So I found a refurbished iPad on the Apple site for really cheap.

My old one...the one that I won as first prize in the Douglas Adams contest back in 2012.....she has had a long a fruitful run. I blogged it all if you wanna look back at it. I believe it is Jan through June of 2012. She was a Ipad gen 3. I won it like 4 or 5 months before the gen 4 came out, but right after it was released. Yeah that year they released them really close together. It is a signal of my accomplishment. It is a reminder of what I can do. It is a memory of Stephen Fry (aaaaaaah) calling my work a love letter that was cute but not too precious. It is a memory of Bob Stein looking me up and giving me a call and saying he thought my comedic choices were good, and that he thought I had talent and potential. He told me to contact him when I was ready to go pro. It is also a reminder of how petty people can be, as it is the only part of the whole prize package I actually recieved.

She has served me well. However, years and years of use and a buse has made her....weary. I have struggled for years to keep her going. I personally replaced the battery andthe bluetooth, and I replaced the screen and digitizer at least 4 times. I have an issue with my joints, and that means from time to time my hands just release and stop holding whatever it is I am holding. Sometimes that means the ipad she ended up on the floor. 😞 When I had a good case for her it was fine. When I didn’t....well that is the reason the screen and digitizer was replaced so many times. This last time when I went to replace the screen I found some internal damage that was fatal. Well, almost. She had been dropped so many times the metal tags that hold the LCD screen in place were completely sheered off. Even though the screen works fine, this means it is floating around inside the iPad and it cannot sync with the digitizer. I can’t just get new tabs....I have to get a whole new LCD screen. Which no one has. iFixit has them off and on, but now is not one of those on times. They also charge $45-$50 for one, without the shipping.

So I had to make a decision. Do I persist in keeping her going with bubblegum and duct tape, or do I move on? Moving on felt...wrong. Like cheating on a spouse. She has been a loyal friend, and a memory I will cherish for the rest of my life. It feels wrong to just give up on her. But she is now old enough I can’t update her further than ios 9. And it will be harder and harder to keep her in action. But.....they engraved “Don’t Panic” on the back of her. But if I have to keep putting $40-$50 into her every couple of months, and she will still only be limping along, is it worth it?

Well, perusing the Apple site and finding the cheap refurbished iPad made my final decision. I bought it. And now I am testing Weebly’s newer app by posting from it.

It is sad. I feel like I betrayed a friend. I feel like we have been through so much together and I am just tossing her aside like yesterday’s jam. There is so much I have been able to accomplish just because she was there in my life. So much more I plan to accomplish, and she won’t be there by my side (or on the floor).

​ I am not going to just throw her out though. I will eventually get the new LCD screen and make her work again. Or I will gut her and put her shell in a shadowbox for my wall. For now I feel like I am mourning a friend. Is that wierd?
0 Comments

Tabard Twiddling

3/7/2018

0 Comments

 
So

A lot has happened this week. I think I am going to concentrate on one thing per post, though. And today I am going to talk about...you guessed it...the tabard. I did do a mock up tabard to figure out how to make it work. I learned what does work....and what doesn't.

I found 2 sheets on Amazon for cheap. Fabric is flippin expensive these days. I think I paid around $10 for both together. One was red, one white. I think that those will be enough to make the white center and the red strips on the sides. I am an idiot when it comes to sewing, so I decided to use the frabic glue strips I used for Aoifa's skirt to hold it together.  I cut the white bit a little too short, so I decided to use it to test the construction and weathering techniques.
Picture
Picture
I then cut some of the red into strips. One side of the sheet was already sewn, so I decided to try to use that. I put the freyed side out though so you can totally see the cuts.
Picture


I just placed the tape on one side, then lined it up with the white piece and removed the backing. I messed up a few places. You can see the puckering.
Picture
Picture


See that puckering? So bad. I will be more careful on the real one. The puckering makes it look uneven. I think that was resolved a little bit with the weathering, but it is still noticeable and bugs me.
After I did both sides, the next thing to do was to practice weathering techniques. I have seen many YouTube videos of people doing it. I thought I would try tea staining, rubbing in dirt, and adding paint blood spatter. Some of it worked, some didn't.

The first thing I did was to cut the edges and frey them. I did not get a picture of that or the process. Sorry. But I just cut it up with scissors then rubbed the hell out of it with a steel wire brush. Just a quick note here, when I can I always get my supplies for this at the local dollar store. My scissors came from there and they are still reasonably sharp after a year of abuse. I also got a set of wire brushes from there. The set had a steel, a brass and a plastic bristle. I used the steel because I felt it would do the most damage in the shortest amount of time.

Next I tried tea staining. Instead of putting the whole garment in a boiling pot with tea, I opted to make strong tea in a mug with salt and blot it on to make the staining less than uniform. Apparently I don't know what that means because it turned out way too uniform. Next time I will make it much blotchier.
Picture
It isn't too bad, but I was going for the long worn look. Stains don't happen evenly. Here it is after I was done. I don't know why I missed taking pictures while I was staining. I did livestream it on Periscope, though, if you wanna watch what I did.

Next I put potting soil in a tub and rubbed the hell out of it.

It literally made very little difference. I may try hitting it again with dirt, just to see if I can get some to stay in the fabric. Also, the red does not show the dirt at all. that is annoying. I need to figure out how to get it darker on the red parts.
Picture
The next part I had to wait a few days. I tried to use the paints I have, but none of them had the right color. So I went online and found a paint for DnD minis called Dried Blood. They also had a Dark Rust and Fresh blood, so I got those too. I couldn't find where I put the fresh blood one, but it looks roughly the same as these two, with the exception of the title and a slight variance in the color. I added a bit of water to make it runnier, and tried it out. To be honest, this brand's dried blood is a bit too burgundy. I added some of the rust paint to the dried blood color and it came out perfect. It was roughly one drop rust to 2 drops dried blood.
Picture
Picture
I tried dipping my fingers in the blood and wiping it on the tabard, to make it look like she had wiped her hand on it. It was a good idea, but the streaming goes the wrong direction. I should have put it on before I tired it. Ah well. Live and learn. The real one will look better.
Picture
Picture
Picture
So overall, I think I know what I am going for now and how to create it. When I do the next one, at the same time I will also do the side pieces for the belt that are meant to match. I need to figure out how wide to make them. Do I make them the same width as the tabard, or wider? I dunno. We will find out. :) I still have no bloody clue how I am going to make that belt work either.
Picture
0 Comments

    Author

    Eleanor...nerd, musician, stop motion animator, techy, crafty. But not in the crafty crafty way...I just like making things. You can find me on Twitch & Twitter @TeaWeaselStopMO & Tiktok.

    RSS Feed

    Picture
    Tips/ Supply Fund
    If you feel like contributing to help me upgrade equipment or pay for building supplies, feel free to click this button. Anything you contribute is appreciated muchly.

    Archives

    August 2021
    May 2021
    March 2021
    February 2021
    November 2020
    October 2020
    July 2020
    March 2020
    January 2020
    December 2019
    November 2019
    October 2019
    August 2019
    July 2019
    June 2019
    May 2019
    March 2019
    February 2019
    January 2019
    December 2018
    October 2018
    September 2018
    August 2018
    July 2018
    June 2018
    May 2018
    April 2018
    March 2018
    February 2018
    January 2018
    December 2017
    November 2017
    October 2017
    September 2017
    August 2017
    July 2017
    June 2017
    May 2017
    April 2017
    March 2017
    February 2017
    January 2017
    December 2016
    November 2016
    October 2016
    September 2016
    August 2016
    July 2016
    June 2016
    May 2016
    February 2016
    January 2016
    November 2015
    October 2015
    September 2015
    August 2015
    February 2015
    September 2014
    April 2014
    March 2014
    January 2014
    December 2013
    November 2013
    October 2013
    September 2013
    August 2013
    July 2013
    May 2013
    April 2013
    March 2013
    February 2013
    January 2013
    December 2012
    November 2012
    October 2012
    September 2012
    August 2012
    July 2012
    June 2012
    May 2012
    April 2012
    March 2012
    February 2012
    January 2012
    December 2011
    November 2011
    July 2011
    June 2011

    Categories

    All
    3d Printing
    4th Of July
    Aardman
    Ae
    After Effects
    Allergies
    And
    And...
    Animation
    Animation Rendering
    Aoifa
    Apothecary Cabinet
    Argh Sigh
    Armatures
    Attack Of The Killer Crows
    Audio Recording
    Babel Fish
    Background Music
    Bad Allergies
    Balsa Wood
    Being A Nerdist
    Birthdays
    Birthdays Suck
    Bob
    Bookcases
    Break Dancing
    Bunny Suicides
    Cake
    Chairs
    Chris Hardiwck
    Chris Hardwick
    Chuffiness
    Clay Building
    Cleaning
    Comical Movement
    Compositing
    Computer Fix
    Conventions
    Copping Out For Tonight
    Cosplay
    Craft Doo Dads
    Craft Doo-dads
    Craft Hoarders
    Crafting
    Creative Commons Copyright
    Creative Constipation
    Creativity
    Crocheting
    Cushions
    Dalek
    Damien Kulash Is Awesome
    David Tennant
    Dialog Matching
    Dice
    Digital Photography
    DnD
    Doctor Who
    Donation
    Douglas Adams
    Doulgas Adams
    Dragon Stop Motion
    Eddie Izzard
    Eddie Izzard Contest
    Eddie Izzard Is A Saint
    Eddie Izzard Sucks
    Epoxy Putty
    EVA Foam
    Excuses
    Failure Leading To Success?
    Fail Whale Video Style
    FAWM
    Fear
    Finally Done
    First Blog Post
    Fixing Things
    Flowers
    Foam-Mo
    Frustrations
    Geek Culture
    Glue Crazy
    Glue Dots
    Humor
    Ineptitude
    Insomnia
    Ipad
    Irish Music
    Jenny Lawson
    Job Hunting
    Job Interview
    Job Search
    Joco Optimism
    Kitten
    Kitty
    Lebowskifest Solo
    Macro Photography
    Magnets
    Mcgyver As A Verb
    Miniatures
    Mini Furniture
    Mini Pottery Wheel
    Minis
    Monkeyjam
    Motivation Constipation
    Movement Test
    Mushy Fish
    Music
    Names
    Neglect
    Neil Gaiman
    Nerdist Way
    New Sets
    New Year
    No Sleep
    Nostalgia
    Nothing Has Made Me Happier
    One Tiny Thing
    Photography
    Pinnacle
    Pinnacle 20
    Podcasting
    Pottery
    Procrastination
    Progress
    Really Small Furniture
    Rip Anatrax
    RL RPG
    RL-RPG
    Rocks
    Sales
    Scene 2
    Scripts
    Sets
    Skills Sets
    Snow
    Somedays You Just Want To Take The Rifle
    Sonic Screwdriver
    Spiders
    Spoon Maille
    Stephen Fry
    Stop Motion
    Stop Motion Animation
    Stop Motion Animation.
    Storytelling
    St Patrick's Day
    Streaming
    Stuck
    Talleg
    Tardis
    Testing
    The Bloggess
    Things I
    Twitter
    Ukulele
    Update
    Venting
    Video Contest
    Video Contests
    Video Cotnest
    Video Delay
    Video Games
    Viscera Cleanup Detail
    Vogon Poetry
    Volunteering
    Wee Furniture
    What The Hell Am I Doing
    Who Needs Sleep?
    Who Needs Sleep?
    Wierd Obsession
    Wigs
    Wil Wheaton Collating Paper
    Write Or Die
    Writing
    Yes
    Yes And
    Yes And. Writing

    RSS Feed

Powered by Create your own unique website with customizable templates.